Today I’ll show you how to turn your Raspberry Pi into a fully-fledged Wireless Access Point. Raspberry Pi 3 and 4 both have a Wi-Fi chip on the mainboard that support AP-Mode (Access Point Mode) and we use the Ethernet port as the WAN uplink, which you can then connect any Wi-Fi device.
This is an intermediate level tutorial with a fair amount of code and edits to system configuration files.
Contents
- Prerequisites
- Notes
- Install & Configure hostapd
- Configure Network Interfaces
- Troubleshooting
- Conclusion
- See Also
- Further Reading
Prerequisites
- You’ll need a RPi-3, RPi-4, RPi-400, with a minimum 8GB microSD card
- Your Pi must have Raspberry Pi OS Lite installed and configured (See my guide: Install & Configure Raspberry Pi OS)
Notes
I will show you two ways to set up a Raspberry Pi WAP (1) using bridged mode where your modem/router acts as the DHCP host and assigns IP addresses while your RPi just handles Wi-Fi authentication and (2) DHCP mode where we will install dnsmasq to assign IP addresses to Wi-Fi devices on the Raspberry Pi’s Wi-Fi network.
Install & Configure hostapd
Before we begin installing software, let’s update and upgrade Raspberry Pi OS:
sudo apt update && sudo apt upgrade -yhostapd (host access point daemon) is a software package that enables any Wi-Fi device that supports AP Mode to be used as a Wi-Fi host and authentication server. Let’s install it now:
sudo apt install hostapdConfigure hostapd
Once hostapd is installed, open the default configuration file:
sudo nano /etc/default/hostapdThen uncomment the following line and add the directory path to our configuration file which we’ll create in the next step:
DAEMON_CONF="/etc/hostapd/hostapd.conf"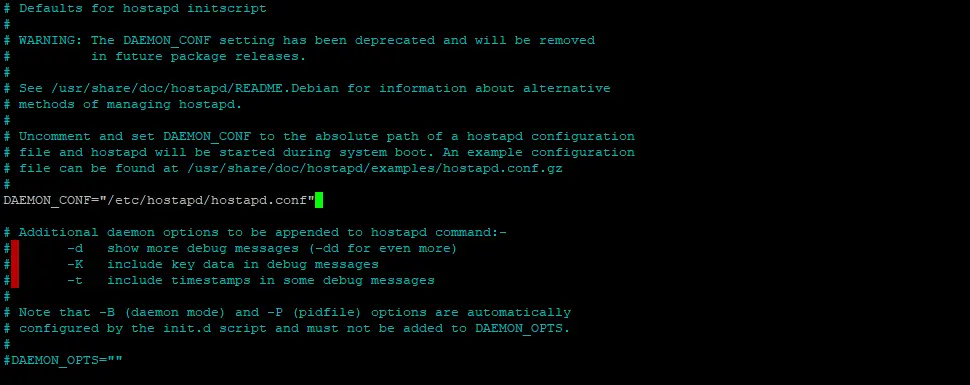
Then save ctrl + o, ENTER and exit nano ctrl + x.
Next, we create the configuration file:
sudo nano /etc/hostapd/hostapd.confWe’re going to enter a number of different variables to set up our wireless LAN access point, so I will go through each one.
First, we give our Wi-Fi and bridge interfaces internal names (neither of these are SSIDs):
interface=wlan0
bridge=br0
Then we add the driver:
driver=nl80211Next, we add the local/country code (Country Code: AU = Australia, IN = INDIA, UK = United Kingdom, US = United Stats, etc. see Country Code List):
country_code=AULet’s give your network an external name/SSID. This is the network name that will appear in any Wi-Fi enabled device as a network available to connect to:
ssid=ricnetEnter the operation mode (network speed). I suggest g for IEEE 802.11g:
hw_mode=gChoose a channel (I suggest 6 or 11):
channel=11Then choose the WPA mode (I suggest 2):
wpa=2Set your Wi-Fi network password/passphrase (replace MySecretPassword with your own password):
wpa_passphrase=MySecretPasswordSet Key and Auth Options for WPA2
Let’s set the key and authentication algorithms for WPA2:
wpa_key_mgmt=WPA-PSK
wpa_pairwise=TKIP
rsn_pairwise=CCMP
auth_algs=1
macaddr_acl=0
You config file should look something like this:

Then save ctrl + o, ENTER and exit nano ctrl + x.
Configure Network Interfaces
Let’s configure the network interfaces. As I said in the notes, you have two choices: (1) set up bridged mode leaving your modem/router to handle IP address assignment and management or (2) install and setup a DHCP host on your Pi that will assign and manage IP addresses for all clients on the Wi-Fi network. If you’re going to setup DHCP mode, skip this section and go to DHCP Mode
Bridged Mode
Let’s install some software required to run in bridged mode:
sudo apt install bridge-utilsWe need to find the IP address of your Raspberry Pi (you’re looking for the IP address of the eth0 interface):
ip address
Then edit the network interfaces:
sudo nano /etc/network/interfacesReplace 192.168.1.223 with your RPi’s IP address, and 192.168.1.1 with your routers IP address.
Create the bridge interface:
auto lo br0
iface lo inet loopback
Configure wlan0:
allow-hotplug wlan0
iface wlan0 inet manual
Configure eth0:
allow-hotplug eth0
iface eth0 inet manual
Configure the bridge interface br0:
iface br0 inet static
    bridge_ports wlan0 eth0
    address 192.168.1.223
    netmask 255.255.255.0
    network 192.168.1.1
    gateway 192.168.1.1
    dns-nameservers 192.168.1.1
Your config file should look something like this:
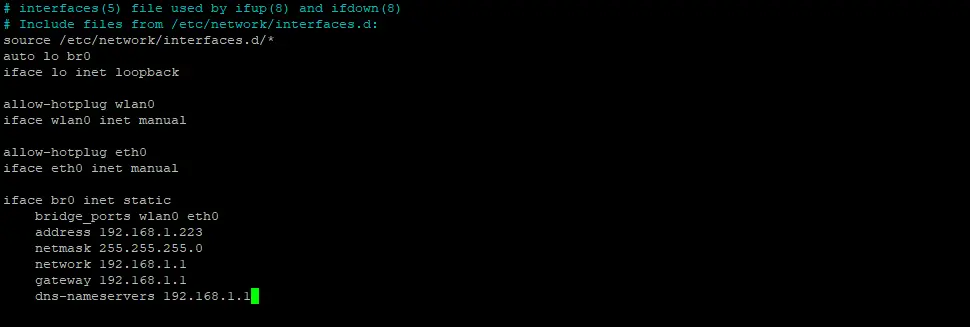
Then save ctrl + o, ENTER and exit nano ctrl + x.
Then reboot:
sudo rebootLogin again and run the following commands to unmask the hostapd service, and unblock wlan to avoid the rfkill: WLAN soft blocked error:
sudo systemctl unmask hostapdsudo systemctl enable hostapdrfkill unblock wlansudo systemctl start hostapdTest Connection
Now you can connect to your Raspberry Pi Wi-Fi router with your phone or other device to make sure it’s all working. If it isn’t, see the troubleshooting section for help.
DHCP Mode
In DHCP mode, your Raspberry Pi will handle IP address assignment and management. In order to do this, we need to install dnsmasq:
sudo apt install dnsmasq -yOnce dnsmasq is installed, open the configuration file:
sudo nano /etc/dhcpcd.confThen add the following line to the bottom of the file:
denyinterfaces wlan0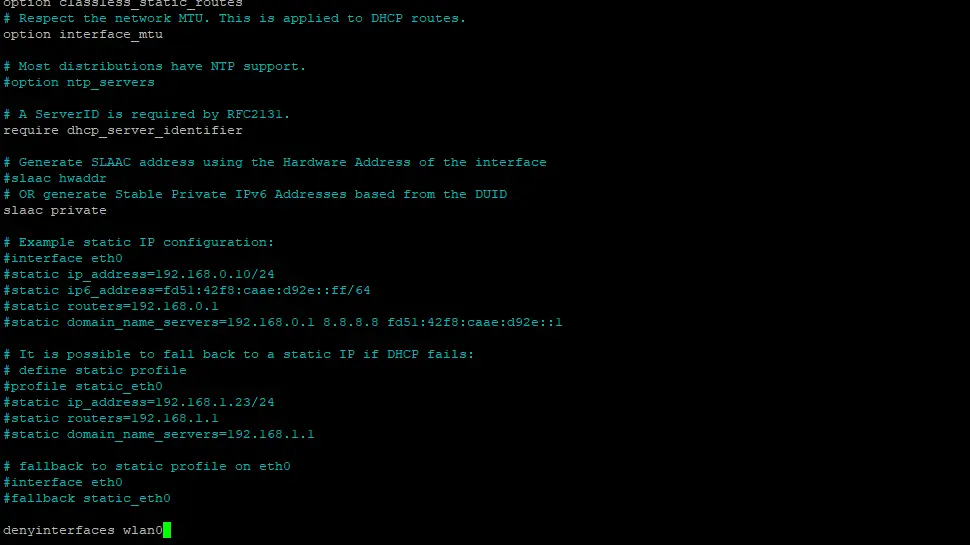
Then save ctrl + o, ENTER and exit nano ctrl + x.
Open the network interface configuration file:
sudo nano /etc/network/interfacesAdd the following code after the top three lines (you can change the subnet if you like).
First, configure the loopback address:
auto lo
iface lo inet loopback
Configure the eth0 interface:
auto eth0
iface eth0 inet dhcp
Configure DHCP addresses:
allow-hotplug wlan0
iface wlan0 inet static
    address 192.168.5.1
    netmask 255.255.255.0
    network 192.168.5.0
    broadcast 192.168.5.255
Your interfaces config file should look something like this:

Then save ctrl + o, ENTER and exit nano ctrl + x.
Open the hostapd configuration file and delete the bridge interface line bridge=br0:
sudo nano /etc/hostapd/hostapd.conf
Then save ctrl + o, ENTER and exit nano ctrl + x.
Configure dnsmasq
dnsmasq is a software package to create a DHCP (Dynamic Host Configuration Protocol) host on any Linux device. Let’s configure dnsmasq.
First, let’s backup the default configuration file:
sudo mv /etc/dnsmasq.conf /etc/dnsmasq.conf.bakThen create a new configuration file:
sudo nano /etc/dnsmasq.confAdd the network information for the DHCP host:
interface=wlan0
listen-address=192.168.5.1
bind-interfaces
server=8.8.8.8
domain-needed
bogus-priv
dhcp-range=192.168.5.100,192.168.5.200,24h
Then save ctrl + o, ENTER and exit nano ctrl + x.
Run the following commands to unmask the hostapd service and unblock wlan to avoid the rfkill: WLAN soft blocked error:
sudo systemctl unmask hostapdsudo systemctl enable hostapdrfkill unblock wlansudo systemctl start hostapdInstall & Configure Iptables
In order for our Raspberry Pi to forward packets and enable Internet access for Wi-Fi clients, we need to configure NAT and install Iptables. Open the system NAT (Network Address Translation) configuration file and uncomment the net.ipv4.ip_forward=1 line:
sudo nano /etc/sysctl.conf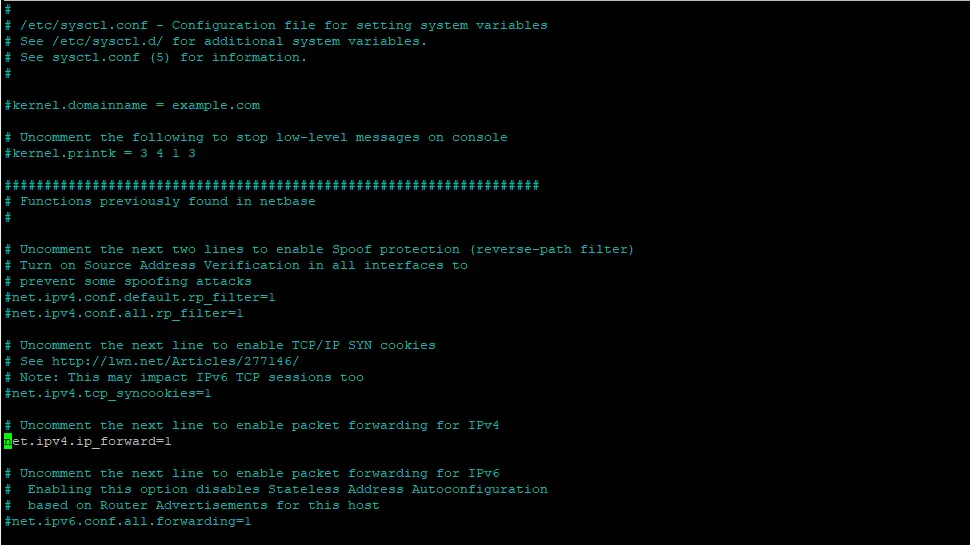
Then save ctrl + o, ENTER and exit nano ctrl + x.
Next, we install the Iptables package:
sudo apt install iptables -yRun the following 3 commands (after the first command, you may need to reconnect your SSH session):
sudo iptables -t nat -A POSTROUTING -o eth0 -j MASQUERADEsudo iptables -A FORWARD -i eth0 -o wlan0 -m state --state RELATED,ESTABLISHED -j ACCEPTsudo iptables -A FORWARD -i wlan0 -o eth0 -j ACCEPTThen we need to make the system save this configuration:
sudo sh -c "iptables-save > /etc/iptables.ipv4.nat"We also need to run the saved config at boot time. Open the rc.local file:
sudo nano /etc/rc.localThen just above the exit 0 line, add the following:
iptables-restore < /etc/iptables.ipv4.nat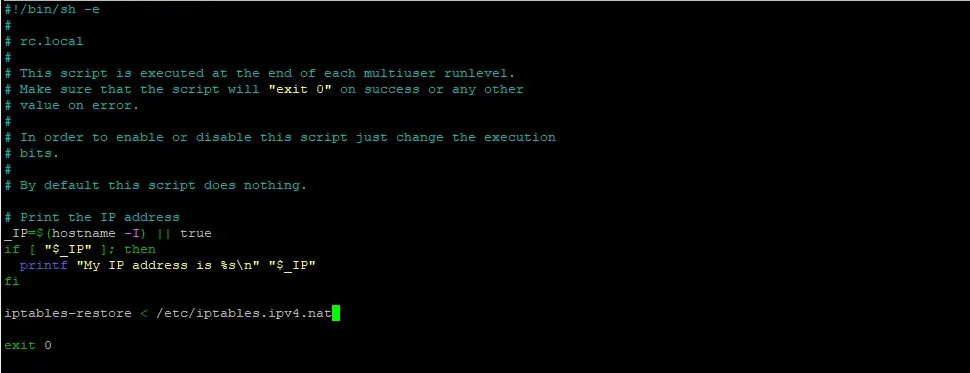
Finally, we reboot to apply the changes:
sudo rebootTest Connection
Now you can connect to your Raspberry Pi Wi-Fi router with your phone or other device to make sure it’s all working. If it isn’t, see the troubleshooting section for help.
Troubleshooting
If things didn’t go to plan, here are some diagnostic commands you can use to see what’s going on. First, check the status of hostapd:
systemctl status hostapdYou should see active (running). If not, search Google for the error you’re receiving.

If you installed dnsmasq as a DHCP host, check its status. You should see active (running), if not, search Google for the error:
systemctl status dnsmasq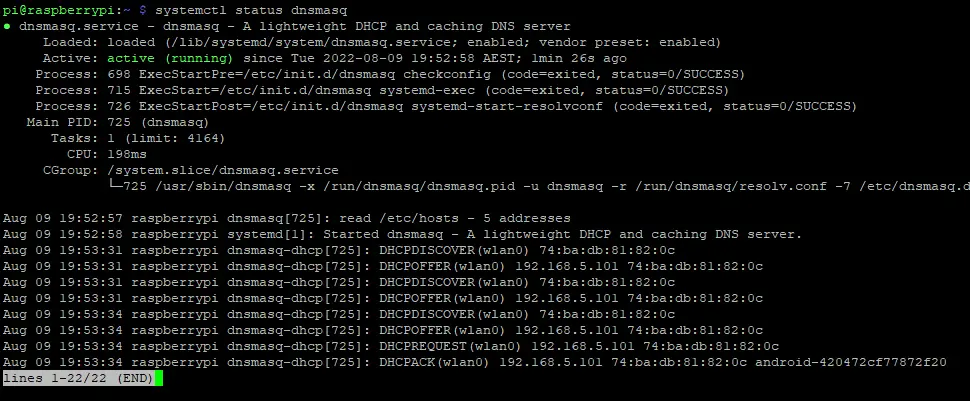
You can also test the dnsmasq configuration to make sure your syntax is correct:
dnsmasq --test
Conclusion
I had a lot of fun writing this guide and was surprised by the speed of the Raspberry Pi Wi-Fi (it was actually faster than my Wi-Fi router, but not as much range). Hopefully you had some fun too. If you ran into any issues, double-check your syntax in configuration files, or see the troubleshooting section.
See Also
- How to Install and Configure Raspberry Pi OS
- Install Ubuntu 22.04 Server Edition on Raspberry Pi
- Raspberry Pi LAMP Server – Complete Guide

Comments
There are currently no comments on this article.
Comment