Today I’ll show you how to install Ubuntu 22.04 LTS 64-bit Server Edition on your Raspberry Pi 2, 3, 4, 400 or Zero. This will give you a secure base to start installing software like Apache web server, MySQL and PHP (LAMP server).
Contents
Prerequisites
- You’ll need a a RPi-3, RPi-4, RPi-400, or Zero
- A suitable MicroSD card (minimum 8GB)
- A card reader (USB card readers are fine)
- An internet connection
Install Ubuntu Server Edition on Raspberry Pi
- Download and install the latest RPi Imager (scroll down until you see the links): www.raspberrypi.com/software/
- Insert your SDHC card into your computer
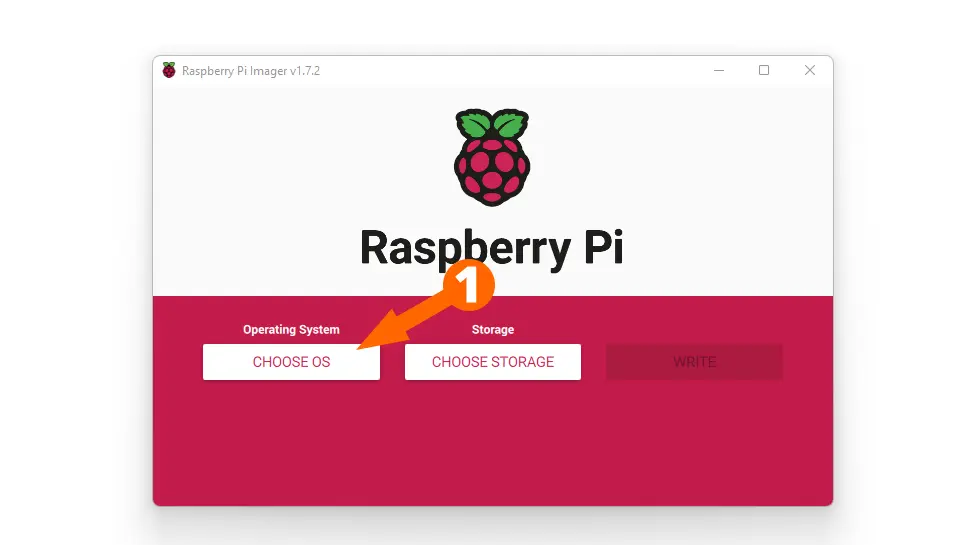
- Open RPi Imager, then click CHOOSE OS
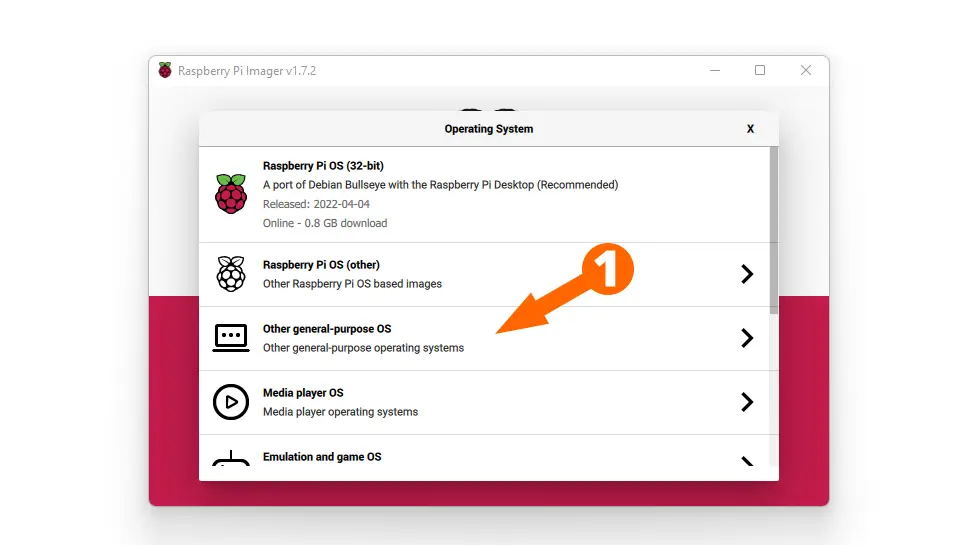
- Click Other general-purpose OS
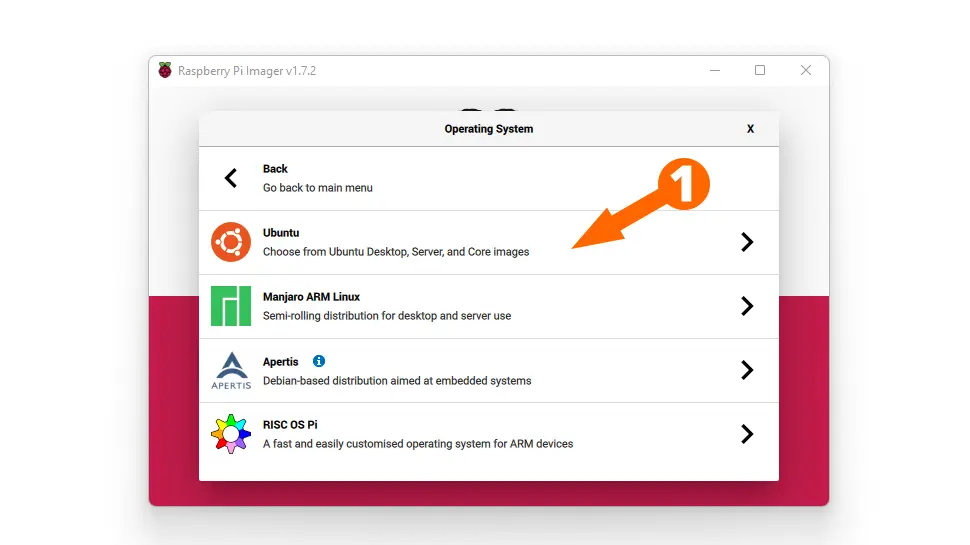
- Click Ubuntu
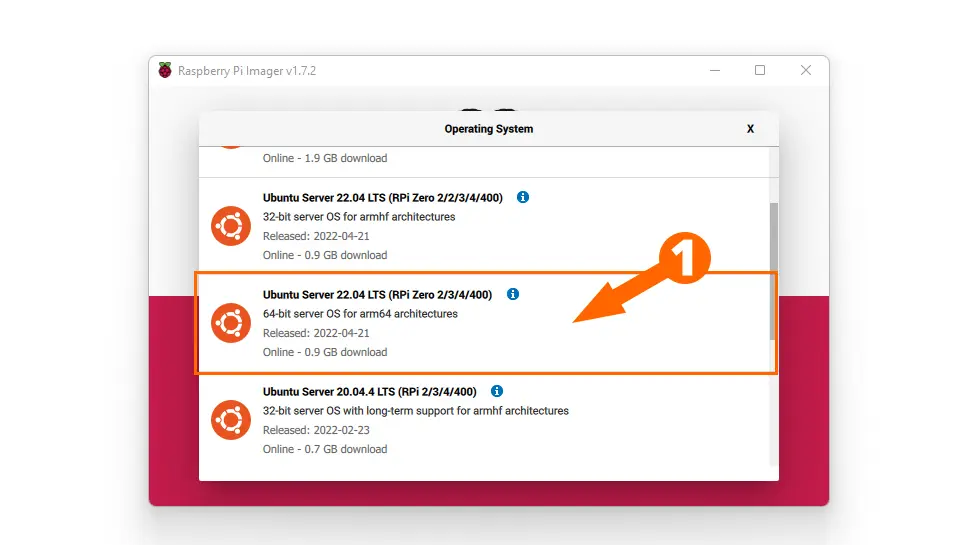
- Click Ubuntu Server 22.04 LTS 64-Bit OR 32-Bit depending on your RPi (if you’re not sure, choose 32-Bit)
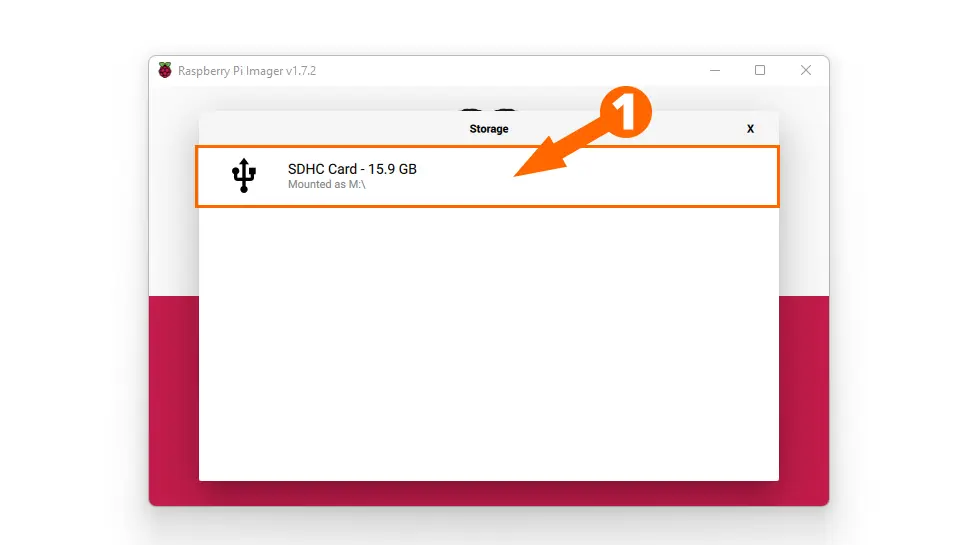
- Click CHOOSE STORAGE and select your SDHC card from the list
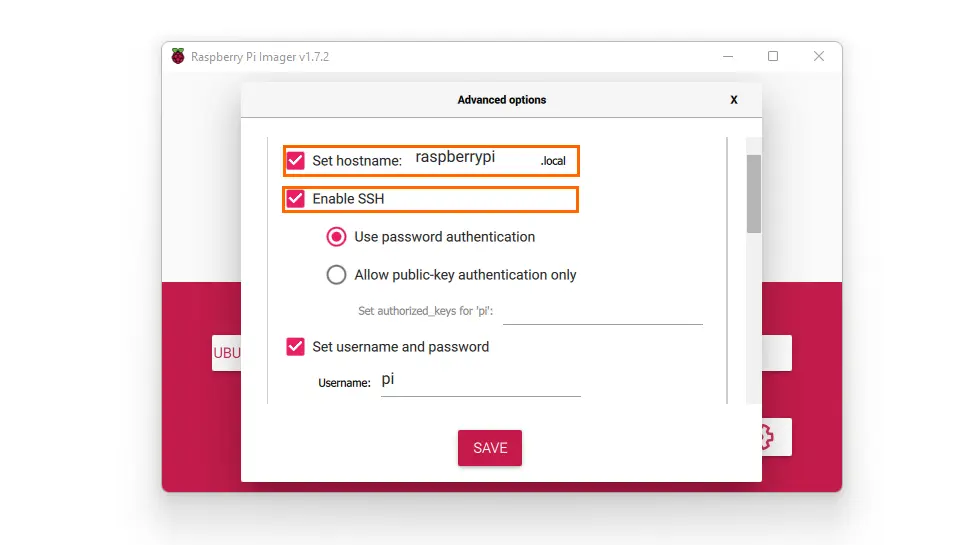
- Click the Gear Icon, then set Hostname to whatever you like, or just leave at default raspberrypi, check Enable SSH
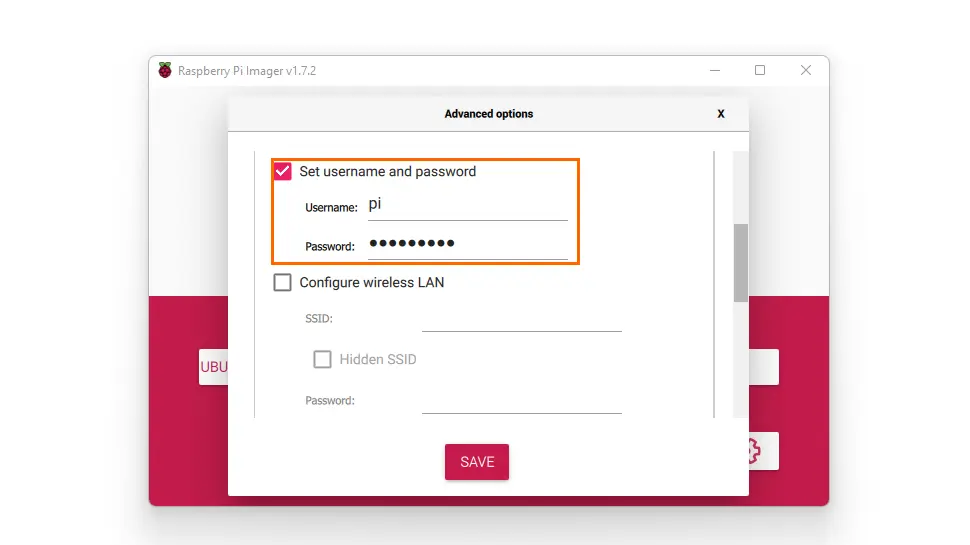
- Scroll down and enter a system/SSH username and password
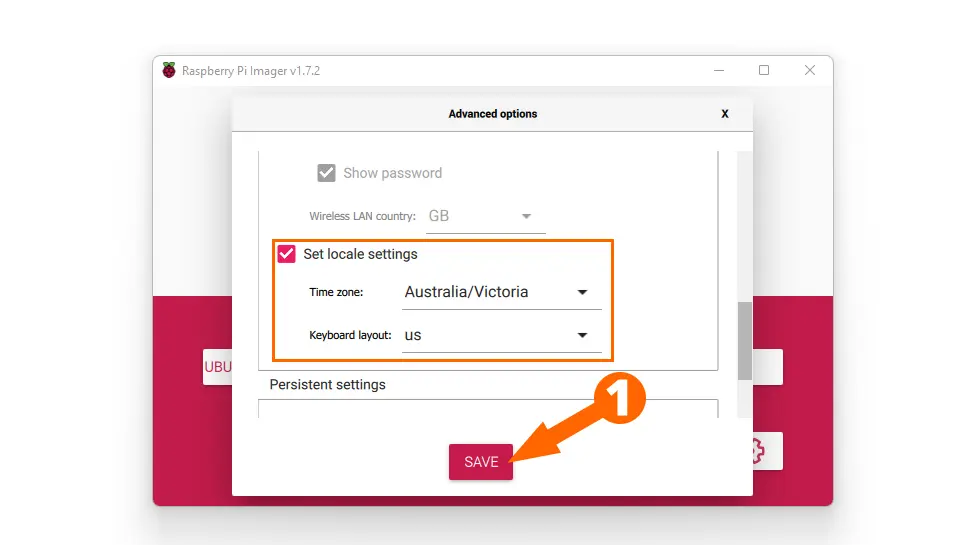
- Scroll down and check Set Locale Settings, set your locale, then click Save
- Click WRITE. The imager will begin to write to your SDHC card and alert you when finished.
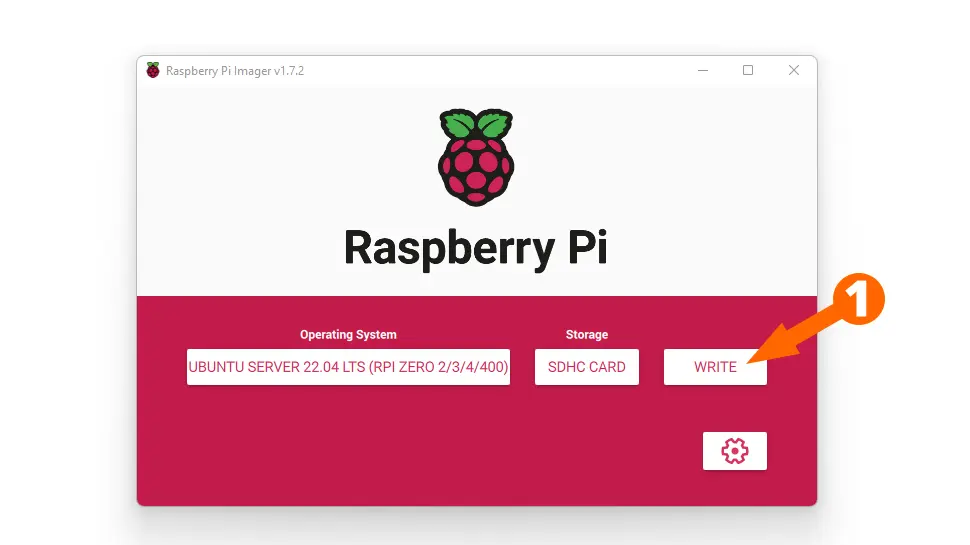
Now you can insert your SDHC card into your Raspberry pi and boot up. Ubuntu will resize partitions on first boot.
Conclusion
Now you have a secure base to start installing software like a LAMP server or any number of other applications. If you had any issues, comment below or contact me on socials/email.
See Also
- Raspberry Pi LAMP Server – Complete Guide
- Build a Raspberry Pi NAS Server
- How to Install and Configure Raspberry Pi OS


Comments
There are currently no comments on this article.
Comment