

Today I’ll show you how to install Google Authenticator to enable 2-Factor Authentication (2FA) for SSH on Ubuntu Server 22.04. Enabling 2-Factor Authentication drastically increases security on your Ubuntu server because even if your username and password are compromised, a hacker would still need to access your phone to login to your server.
Contents
- Recommended Books
- Prerequisites
- Install Google Authenticator
- Enable the SSH Daemon for 2FA
- Test 2-Factor Authentication
- Conclusion
- See Also
- Further Reading
Recommended Books
I can highly recommend these books on Linux Administration if you want to go further.
- The Linux Bible 10th Edition
- The Linux Command Line, 2nd Edition: A Complete Introduction
- Linux Administration: The Linux Operating System and Command Line Guide for Linux Administrators
Prerequisites
- You will need a mobile phone with Google Authenticator installed (see iPhone or Android )
- You will need either root access, or a user with
sudoprivileges on your Ubuntu server (see initial server setup guide)
Install Google Authenticator
Let’s begin by installing the Google Authenticator package:
sudo apt install libpam-google-authenticator -yLet’s run the Google Authenticator app to generate a QR code (note* do not use sudo for this command otherwise it will be setup for root instead of your current user):
google-authenticator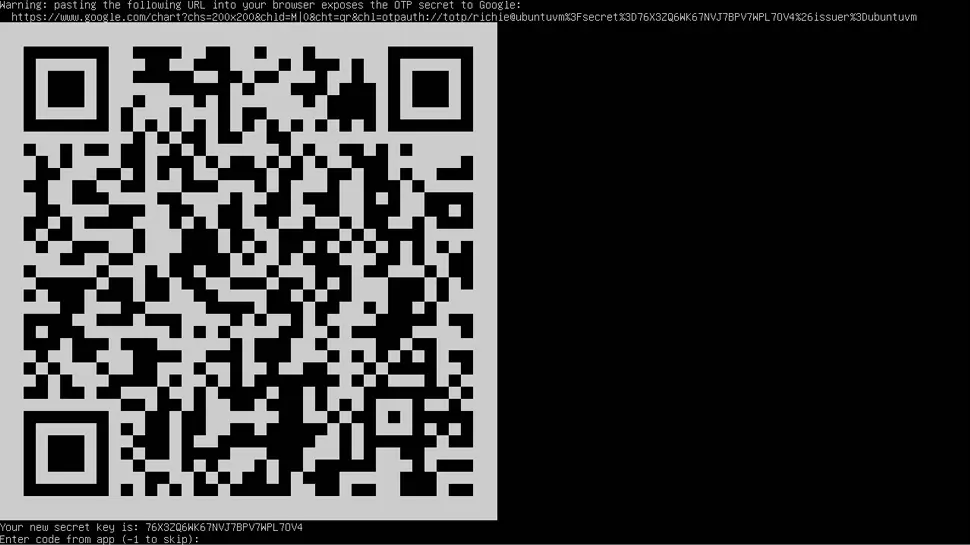
I recommend you answer the questions as follows:
- Do you want authentication tokens to be time-based? – Yes
- Go ahead and scan the QR code (tap the Plus + icon, then tap Scan QR Code), then enter the newest code on your Authenticator phone app, then ENTER
- Note down your emergency scratch codes
- Do you want me to update your ‘/home/username/.google_authenticator’ file? – Yes
- Do you want to disallow multiple uses of the same authentication token? – Yes
- For the extend time in order to compensate for possible time-skew question – Yes or No (up to you)
- Do you want to enable rate-limiting? – Yes
Enable the SSH Daemon for 2FA
Now we configure your SSH daemon to work with 2FA and the Google Authenticator package. Open your SSH configuration file:
sudo nano /etc/ssh/sshd_configChange the following two options to yes:
KbdInteractiveAuthentication yes
UsePAM yes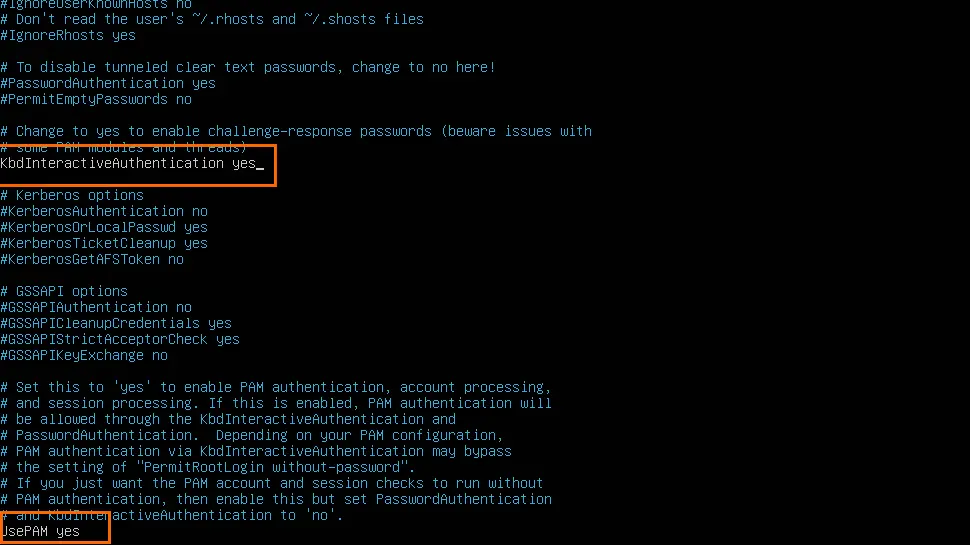
Then save ctrl + o, ENTER and exit nano ctrl + x.
We also need edit the PAM configuration file and add Google Authenticator:
sudo nano /etc/pam.d/sshdThen just after the @include common-auth add the following line:
auth required pam_google_authenticator.so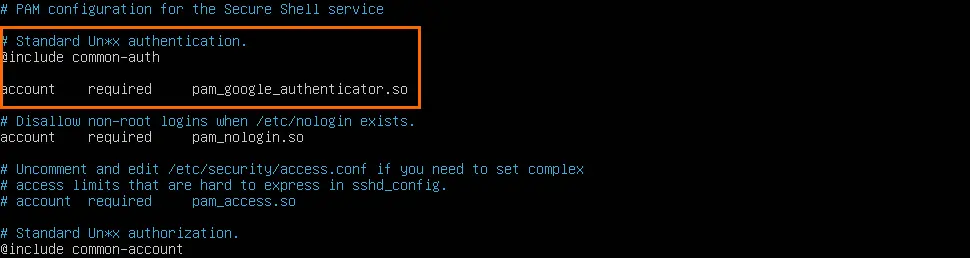
Then save ctrl + o, ENTER and exit nano ctrl + x.
Finally, we restart the SSHD service:
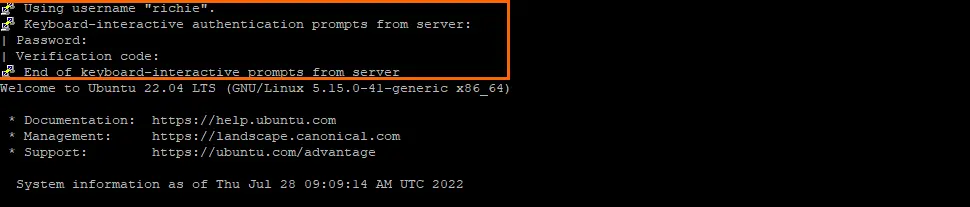
sudo systemctl restart sshdTest 2-Factor Authentication
Open your SSH client (i.e. PuTTY) and login with username, password, then enter the code on your Google Authenticator app.
Conclusion
You should now have 2-Factor Authentication enabled on your Ubuntu server using the Google Authenticator app. If you had any trouble, hit me up in the comments or socials/email, and don’t forget my Newsletter Sign Up for all the latest tutorials delivered to your inbox.
See Also
- Initial Server Setup with Ubuntu 22.04
- How to Secure a LAMP Server
- The Ultimate Web Server on Ubuntu 22.04
Comments
There are currently no comments on this article.
Comment